If you’re starting in live sound, worship audio, or studio recording, understanding a Sound Mixers console is the fastest way to make your system clearer and easier to control. Instead of turning knobs randomly, you’ll know what each section does and how to route audio properly.
In this beginner-friendly guide, you’ll learn the essentials covered in Decibel Audio Kenya’s “Understanding Mixers,” including plain vs powered mixers, channels, EQ, gain, aux outputs, phantom power, panning, groups, and stereo channels.
You can also watch the video here: Sound Mixers Video
A mixer is the “brain” that collects signals from microphones and instruments and routes them into the outputs you need—like speakers, recorders, or monitor systems.
Once you understand these core concepts, you can:
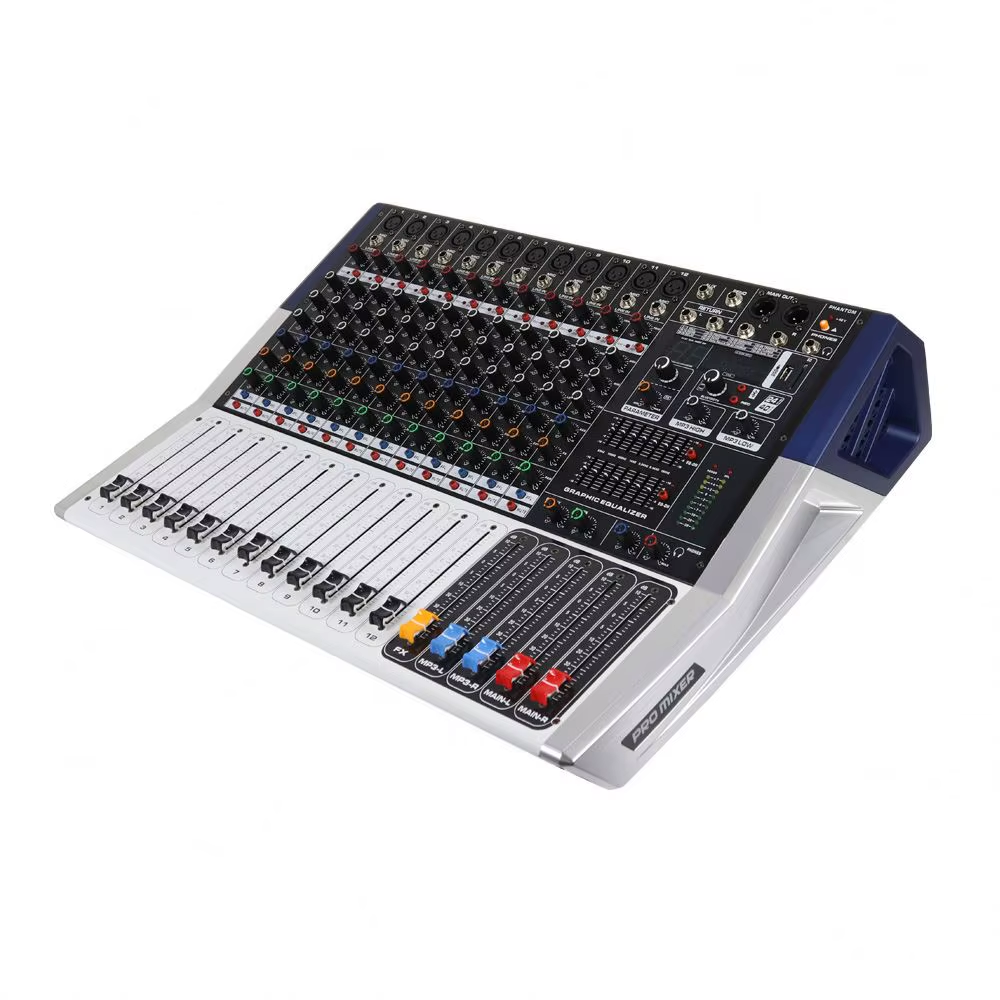
A plain mixer is an audio console that does not include a built-in amplifier. Its main job is to:
A powered mixer includes an inbuilt amplifier. So instead of sending your mixed output to an external amplifier, the mixer can directly drive speakers (depending on the model and configuration).
Both plain and powered mixers handle similar mixing tasks (EQ, gain, panning, aux, groups), but the difference is where the amplification happens.
You usually choose a plain mixer if you already have:
You choose a powered mixer if you want:
Beginner rule: If your speakers are not powered, you’ll need either:
The number of channels you need depends on how many inputs you will use at the same time.
For example:
If you buy fewer channels than you need, you’ll be forced to:
EQ is used to improve sound by:
In simple terms, EQ helps you shape tone so vocals and instruments sit better in the mix.
Beginner tip: make small EQ changes at a time. Over-EQ often leads to unnatural sound and increased distortion.
Gain boosts the incoming signal strength so the mixer can process it clearly.
Why gain matters:
For a clean mix, you want a strong signal with enough headroom (room to handle peaks without distortion).
Auxiliary (Aux) outputs are extra outputs you can send to other destinations—like:
You can build separate mixes for different needs. For example, the front-of-house mix might be different from what a musician needs in their monitor.
Phantom power (+48V) is required for condenser microphones (common in studio recording).
Beginner safety reminder: Only activate phantom power when you know your microphone needs it. When used correctly, it helps you get clean condenser mic sound.
The pan knob positions a channel’s audio between:
So, instead of everything being centered, panning creates a wider and more balanced stereo image.
If you’re using mono sources (most vocals in live sound), you often keep pan near center, but stereo effects and instruments can benefit from panning.
Groups are like “folders” inside the mixer.
They allow you to combine multiple channels into one control output, for example:
This makes live control easier and helps avoid forgetting to adjust several channels individually.
Some channels are paired or designed for stereo operation. Stereo channels help you handle:
Using stereo correctly keeps your mix balanced and more natural for listeners.
Use this as your basic workflow when you’re setting up a sound system with a mixer:
Understanding Sound Mixers means understanding signal flow and control: channels bring inputs in, gain keeps signals clean, EQ shapes tone, aux sends create monitor/recording mixes, phantom power powers condensers, panning balances stereo, and groups simplify control.
Once you learn these basics, you can approach any mixer setup with confidence—whether it’s a plain mixer with an external amp or a powered mixer that drives speakers directly.

© 2026 Decibel Audio Kenya. Designed by Tannbit