Connecting a Sound System (Decibel Audio Kenya Signal Flow Guide)
If you’re learning how to connect a sound system, the biggest challenge isn’t just wiring—it’s understanding signal flow . When you know the path your audio takes (mic → mixer → processing → crossover → amps → speakers), setup becomes easier and troubleshooting becomes faster.
This guide follows the same practical workflow explained by decibel audio kenya CONNECTING A SOUND SYSTEM ” video.
Watch the video here: https://www.youtube.com/watch?v=HYDTIio_TSE&t=61s Nairobi Branch (TikTok): https://www.tiktok.com/@decibelaudiokenya Mombasa Branch (TikTok): https://www.tiktok.com/@decibel.audio.mom
1. Introduction: What “Connecting a Sound System” Really Means
Connecting a sound system means:
routing audio from inputs (mics/instruments),
mixing and balancing levels,
processing the sound (EQ/exciter),
splitting frequencies (crossover),
amplifying the right bands,
and sending them to the correct speakers,
while also creating monitor mixes for performers.
You’re not just “plugging cables.” You’re building a chain that must stay clean and stable.
2. The Signal Flow Overview (From Mic to Speakers)
A typical professional signal flow (like the one shown in the video) looks like this:
Microphones / Instruments Mixing Console (Mixer) Graphic Equalizer (Main EQ) Exciter (optional enhancement) Crossover (splits highs/mids/lows) Amplifiers (different amps for different speaker types) Speakers (tops/mids/subs) Aux Sends → Monitor EQ → Monitor Amplifier → Monitors
Now let’s break it down step-by-step.
3. Step 1 — Inputs into the Mixer (Sound Standard Signature 16)
3.1 Channel balancing basics
Start by plugging your inputs into the mixer channels:
Then balance each channel so:
vocals are clear,
instruments sit correctly,
and nothing is overpowering.
3.2 Gain staging: keep gain low to avoid clipping
The video emphasizes a key beginner rule: gain should be kept low .
Why?
If gain is too high, the mixer input clips.
Clipping creates distortion.
Distortion travels through the entire system and can damage speakers and amplifiers.
Beginner method:
Set channel fader low.
Turn gain up slowly until the channel is audible and clean.
Avoid constant red/overload indicators (if your mixer has them).
4. Step 2 — Main Output to Graphic EQ (EVP Audio)
After mixing, take the main output from the mixer and send it to a graphic equalizer .
This EQ is used to adjust frequencies for front-of-house speakers:
reduce harshness,
reduce boominess,
improve clarity,
and match the room.
Tip: Make small EQ changes. Big boosts often create feedback and distortion.
5. Step 3 — Exciter: Enhancing clarity and harmonics
Next, the processed signal goes into an exciter .
An exciter is used to enhance perceived clarity and harmonics—especially in the high and low-end areas—so the sound feels more “alive.”
Beginner caution: Exciters can make sound brighter and louder, but too much can also sound unnatural or harsh. Use it lightly.
6. Step 4 — Crossover : Sending highs/mids/lows to the right amps
The signal then enters the crossover .
A crossover splits your audio into frequency bands:
Highs → high/mid-high speakers (tops/tweeters)Mids → mid-range speakersLows → subwoofers/bass speakers
This is important because:
each speaker type is designed for its frequency range,
and the system stays cleaner at higher volumes.
7. Step 5 — Amplifiers and Speaker Connections
7.1 Mid-range amplification (example: C18)
The video mentions Sound Standard amplifiers
C18 for mid-range speakers.
So your mid band output from the crossover should feed the C18 amplifier, then into the mid-range cabinets.
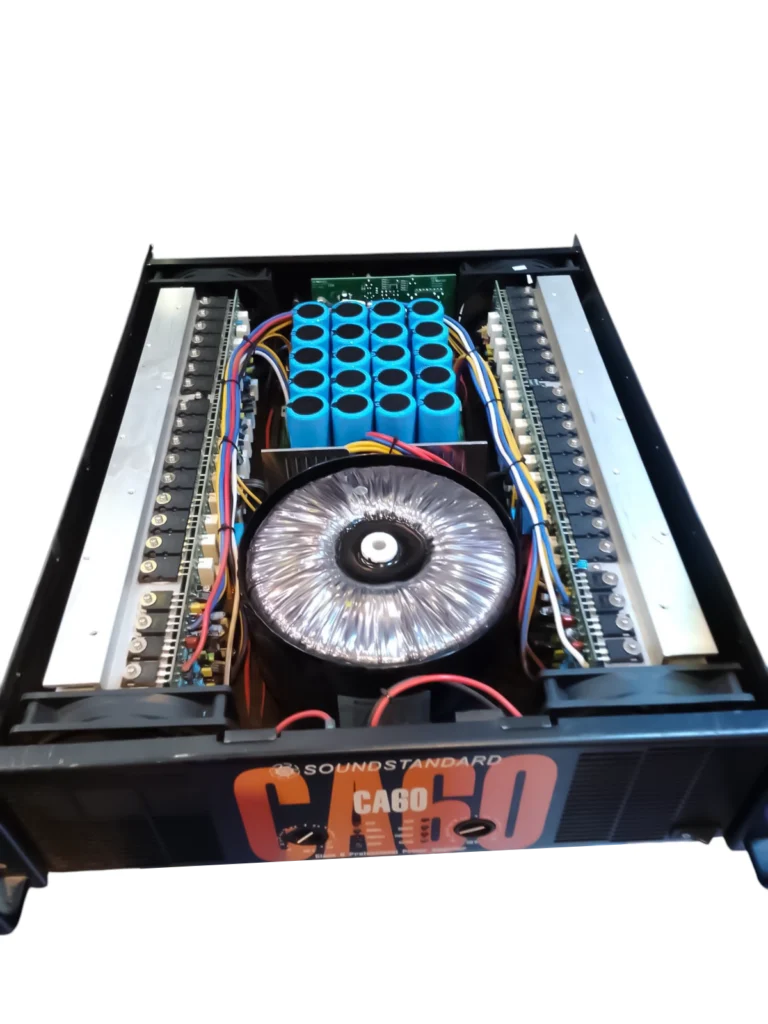
7.2 Subwoofer amplification (example: CA20)
For the low band (bass/sub), the video references:
So your low band output from the crossover should feed the CA20 , then into your subwoofers.
Key rule: Don’t connect the wrong crossover band to the wrong amplifier/speaker type.
8. Step 6 — Monitors with Aux Sends (Stage mix)
Live sound isn’t only front-of-house. Performers need monitors.
8.1 Aux mix routing to a second EQ
The video explains that auxiliary channels are used to create independent monitor mixes.
Typically:
Mixer aux send → monitor EQ
Monitor EQ → monitor amplifier
This lets you control what each performer hears without changing the main FOH mix.
8.2 Separate monitor amplifier (example: CA12)
The video references a separate amplifier for monitors:
So your monitor band output goes into CA12 , then to your stage monitors.
9. Step 7 — Quick Equipment Checklist (Before Power-Up)
Before you turn anything on, verify:
Mixer channels are connected correctly (mic/instrument inputs).
Main output cables go to the correct EQ input.
EQ output goes to exciter input.
Exciter output goes to crossover input.
Crossover outputs go to the correct amplifiers (high/mid/low).
Aux sends go to monitor EQ and then to monitor amplifier.
Speaker cables are connected to the correct amplifier outputs.
Volume controls are turned down to avoid sudden loud bursts.
10. Common Beginner Mistakes to Avoid
Setting gain too high (causes clipping and distortion).Over-EQing (boosting too much instead of cutting problems).Wrong crossover wiring (highs sent to subs, etc.).No monitor control (performers suffer, and feedback increases).Skipping signal checks (always do a quick test before the event).
If you want the exact walkthrough and how the presenter routes each stage, watch the video here:https://www.youtube.com/watch?v=HYDTIio_TSE&t=61s